Pyramid Head Costume
Rate this costume:
|
9 votes
| 1 comment · add a comment |

Full Pyramid
| Costume type: | Costumes for Adults |
| Categories: |
This homemade costume for adults entered our 2014 Halloween Costume Contest.
A word from Chrisi, the 'Pyramid Head' costume creator:
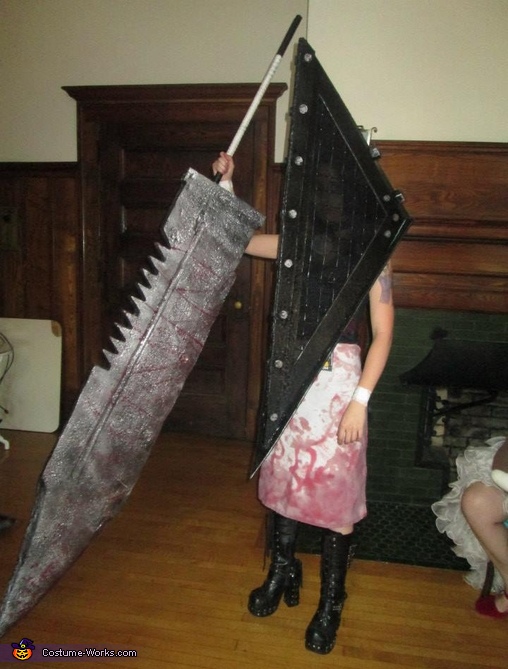
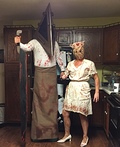
The person wearing this is myself. The idea for it comes straight from some of worst nightmares honestly, but really it comes from the movie/video game Silent Hill. Honestly the how to instructions for this thing are just ridiculous, I could barely find any decent tutorials myself, but I can at least give some general material info.. The helmet and great knife are both made my me with help from my oh so handy puddin'. The helmet is made from this thin blue foam you can buy at either lowes or home depot. It comes in a large accordion stack that's around 50 dollars... it's rather expensive but there is ALOT of foam in the stack, so if you mess up you have alot of foam to work with. MAKE THE HELMET OUT OF CARDBOARD FIRST!! that is super important, this is so you can figure out the proper angles and lengths for the front panels, those are the angles and lengths that matter the most when it comes to this thing. I can't remember the angles for it (the angles will be the same no matter how big the helmet) but i do remember how we determined them. We found the best side view picture of pyramid head and used a clear plastic protractor and laid it down on the image at the corners of the triangles, it's a perfect method actually. I used window screen and plastic chicken fencing for the window covering. The more window screen you use the better though, it keeps people for seeing your face. The lengths at this point are really up to how long you want the nose to be. I wanted mine to be ridiculous huge, go big or go home i always say. Be cautious when piecing the front two panels together (piece these together before any other attachments but make sure you cut out your windows first) don't make the distance between the two wider than your shoulders.. mine is wider and it causes problems but I also wasnt able to build a harness for it with the time I had to build it before the convention. Try attaching a black bicycle helmet to the inside but you may also want to build a shoulder harness out of something for it to rest on. Word of caution! if you wish to spray paint this foam coat it in several layers of mod podge glue first, this will protect it from melting from the spray paint. also try to use floral spray paint, if you want to use regular spray paint that is fine just spray it gently. I use matte black shirt paint to paint mine, and i also painted the inside of the helmet black otherwise it would have been a silly blue color. Painting the inside also helps fight light issues (people being able to see your face i mean) the less the light shows after all, the less people see. Now the great knife, which ended up being 8 feet long in total, is made out of the thickest style of insulation foam board. Easy to cut, easy to carve, easy to sand and light weight, also if needed, super easy to melt (dangerous though!) we drew out the pattern straight onto the foam once with blue marker and then again with black, carefully>> use a sharp kitchen knife for the basix shape and an extendable blade for carving the blade shape itsself. A gentle sawing motion with the blade is necessary you can't just pull the blade along the foam, saw it off in gentle thin strokes, it takes a while but carving foam is actually relaxing and addictive. again you need to coat this with some sort of sealing protector before spray painting it.. we sorta messed up and used bondo... it melted the outer most edge of the foam, but in all honesty we just went with it! after we painted the knife it has this really sick (i mean that in a good way) ancient decay look to it. I have no clear way of doing the handle.. we probably did it in the most unsafe and hazardous way possible so I'm not gonna post it... but we used a wooden dowel and no we did not just push it into the foam, that doesn't work it just cracks. So I hope that's enough walkthrough for making it. The outfit for this costume wasnt what i was originally going to go with, but i ran out of time so i threw on my best dress and a bloody apron with some high boots and called it a day. Oh and as for the gluing the helmet togehter... i used hot glue, its coming apart in some spots though, i have no clear way on glue for this, they do make a special foam adhesive you can get online though. the silver detail work in the helmet i used a soft sponge and sprayed silver spray paint on a paper plate and gently brushed it on to make it look tarnished. and i carved the huge bolt out of the insulation block that the knife was made from. OH! importante! the helmet is going to need reinforcement. i used corrugated plasitc but you can use cardboard too... just do some strips on the inside of the helmet. keeps it from bending, warping or wobbling and its still light weight. (the second picture has as incomplete paint job but i just wanted to show the back of the helmet)
Similar costumes:
Rating: 4.0 of 5. Votes: 9
|
9 votes
|


